Custom Directives in Angular
For those who do a lot of angular, you might have used ng-bind, ng-init somewhere in your project. These are the built-in directives that are provided to us by the angular team. We’ll see how to create our very own directive in angular.
So to create one, we need to understand different types of custom directives.
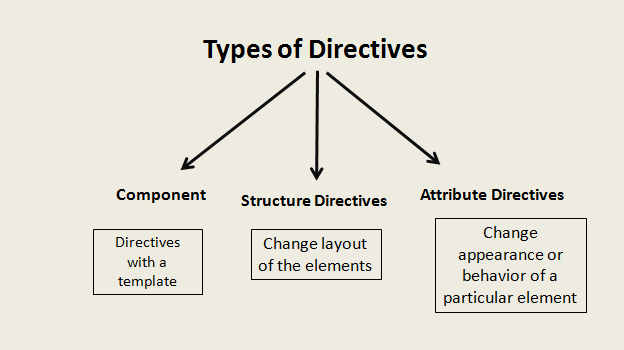
There are few steps in the process of creating a custom attribute directive.
Step 1. Create a directive by decorating a class with the @Directive decorator.
Step 2. Inject Services ElementRef and Renderer
Step 3. Register your directive in the module
Step 4. Use your directive
import { Directive, ElementRef, Renderer } from "@angular/core";

@Directive({
    selector: '[app-ch-color]'
})
export class bgDirective{
    constructor(private el: ElementRef, private renderer: Renderer){
        this.changeColor('red');
    }
    changeColor(color: string){
        this.renderer.setElementStyle(this.el.nativeElement, 'color', color);
    }
}
import { Directive, ElementRef, Renderer } from "@angular/core";

@Directive({
    selector: '[app-ch-color]'
})
export class bgDirective{
    constructor(private el: ElementRef, private renderer: Renderer){
        this.changeColor('red');
    }
    changeColor(color: string){
        this.renderer.setElementStyle(this.el.nativeElement, 'color', color);
    }
}
To dive deep into the usage of Custom Attribute Directives, we need to understand some terminology. When a custom Directive is applied to an HTML element, that element is called the HOST ELEMENT. SO in the above scenario, the custom directive is [app-ch-color] and the HOST ELEMENT will be the div on which you apply [app-ch-color].
<div app-ch-color>
  Hello Nepal!!!
</div>
<div>
  Hello Nepal!!! (No Custom Attribute applied)
</div>
<div app-ch-color>
  Hello Nepal!!!
</div>
<div>
  Hello Nepal!!! (No Custom Attribute applied)
</div>
To capture the event of your Host Element, you need to use @HostListener().
import { Directive, ElementRef, Renderer, HostListener } from "@angular/core";

@Directive({
    selector: '[app-ch-color]'
})
export class bgDirective{
    constructor(private el: ElementRef, private renderer: Renderer){
        this.changeColor('red');
    }
    @HostListener('click') foo(){
        alert('Host Element is clicked');
        this.changeColor('green');
    }
    changeColor(color: string){
        this.renderer.setElementStyle(this.el.nativeElement, 'color', color);
    }
}
So, to capture event foo() for host element div, we use @HostListener() which alerts that the host element is clicked.
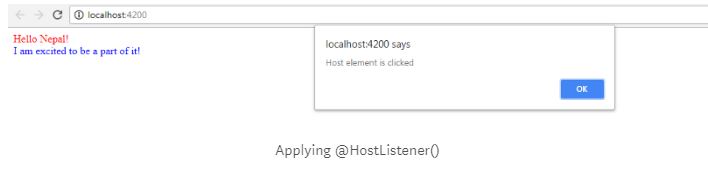
Similarly, to capture a property of the host element, we use @HostBinding().
import { Directive, ElementRef, Renderer, HostListener } from "@angular/core";

@Directive({
    selector: '[app-ch-color]'
})
export class bgDirective{
    constructor(private el: ElementRef, private renderer: Renderer){
        this.changeColor('red');
    }
    @HostBinding('style.border') border : string;
    @HostListener('click') koo(){
      this.border = '5px solid yellow';
    }
    changeColor(color: string){
        this.renderer.setElementStyle(this.el.nativeElement, 'color', color);
    }
}

This is a very basic example to understand what Custom Directives are! We can solve much more complex requirements using Custom Directives in Angular.